Participate in Dynamic TAO - Testnet
Learn how to participate in Bittensor's Dynamic TAO testnet using either BTCLI or Polkadot.js. This guide covers two simple methods: installing BTCLI locally or using a browser-based solution through Polkadot.js.
The BTCLI method requires installing the Dynamic TAO -enabled version of Bittensor CLI on your computer. This approach gives you direct command-line access to participate in the testnet, allowing you to stake TAO into subnets and earn subnet token dividends. While this method requires basic terminal usage, it provides the most straightforward way to test Dynamic TAO features. Follow these steps to get started with the testnet using BTCLI:
Table Of Contents
1. Install Dependencies
Before installing BTCLI, you need to update your system and install Python dependencies.
Open your terminal and run:
apt update && apt upgrade && apt install python3-pip python3.10-venvYou may need to add "sudo" before the command if you get permission errors.
After running this command, your system will be updated and have the required Python packages installed to proceed with the BTCLI installation.
CONFIRM INSTALLATION
During the installation process, you will be prompted twice to confirm:
- First prompt: Type 'Y' and press Enter to confirm system updates
- Second prompt: Type 'Y' and press Enter to confirm package installation
2. Set Up Virtual Environment
Create and activate a Python virtual environment to keep BTCLI installation isolated from your system's Python packages.
First, create the virtual environment:
python3 -m venv .dtaoThen activate it:
. .dtao/bin/activateALWAYS ACTIVATE YOUR ENVIRONMENT
Your terminal prompt should now start with (.dtao), indicating you're in the virtual environment.
Always make sure you're in this virtual environment when using BTCLI commands. If you open a new terminal, you'll need to activate the environment again
3. Install BTCLI
With the virtual environment active, install the Dynamic TAO-enabled version of BTCLI:
pip install bittensor-cli=9.0.0rc2This specific version (8.2.0rc13) is required to be able to participate in Dynamic TAO on testnet.
You can verify the installation by running:
btcli --help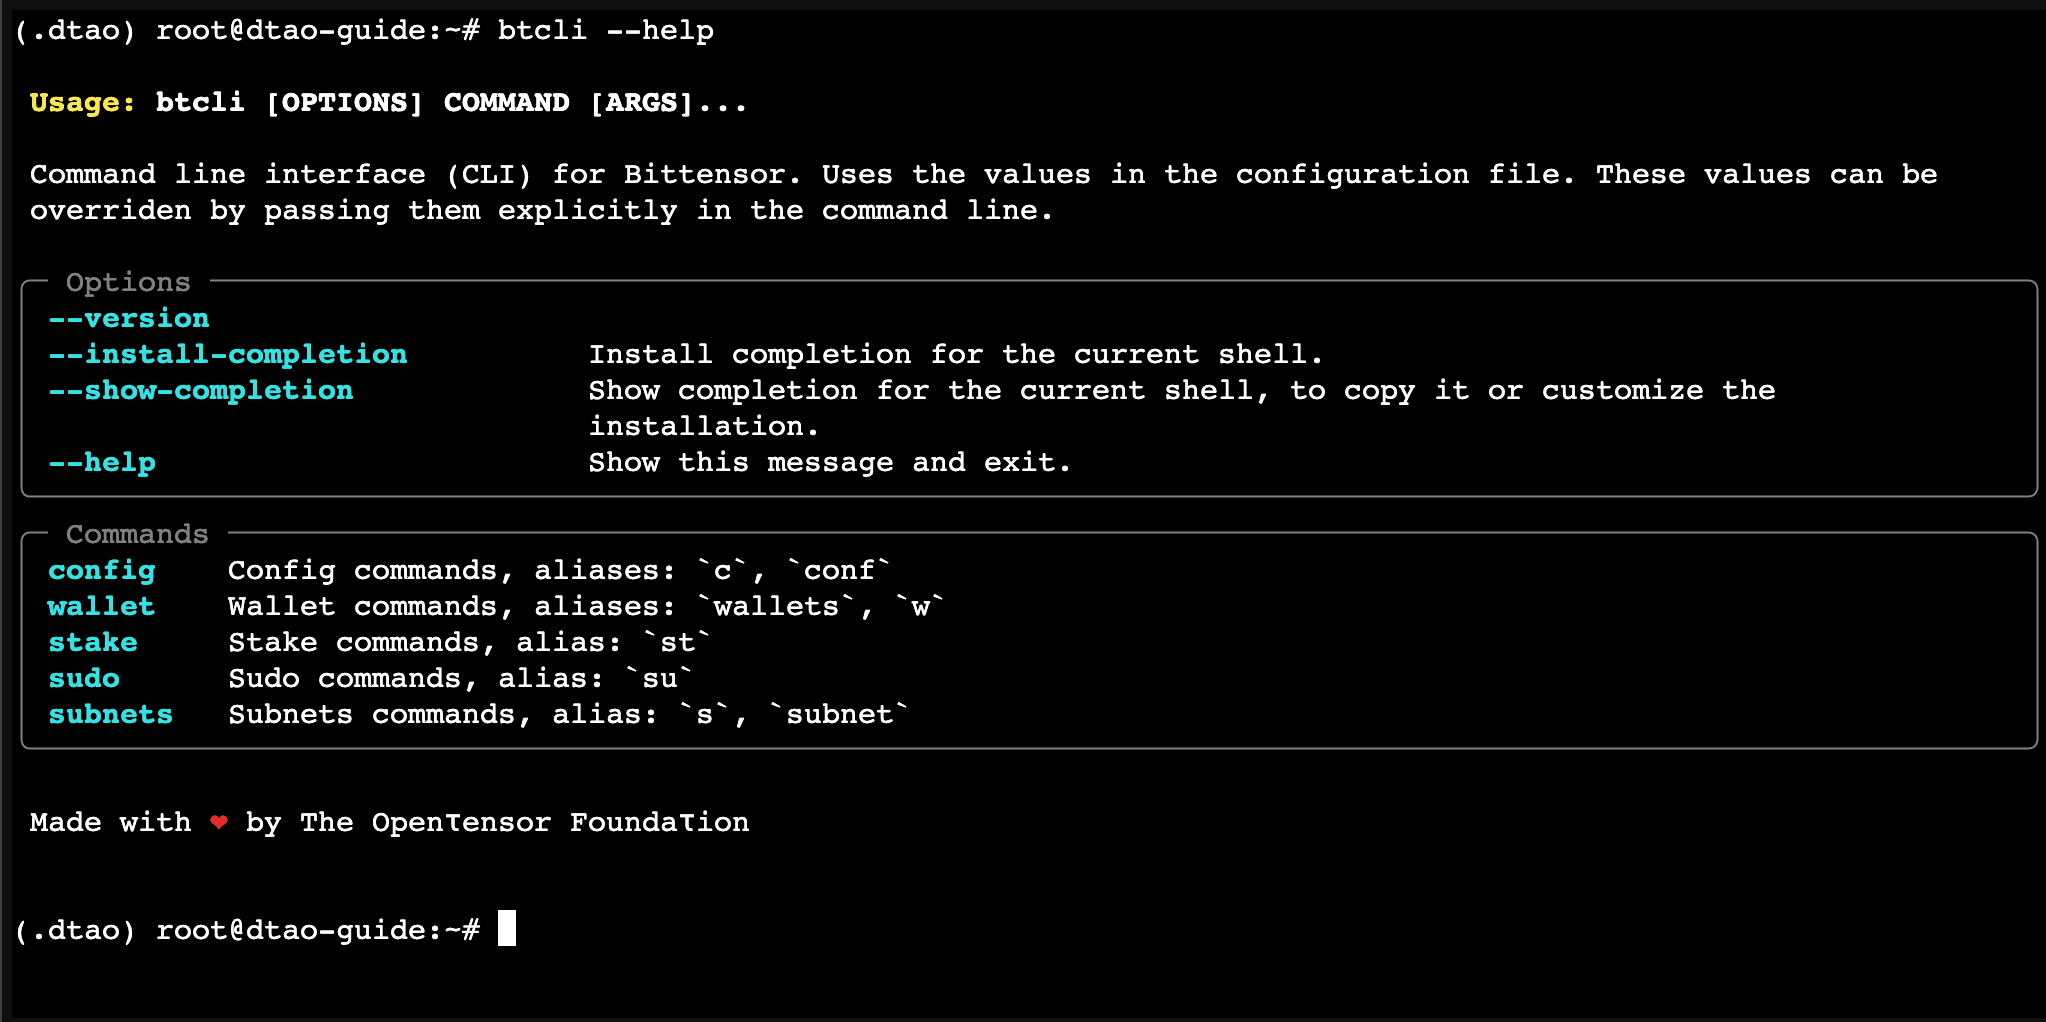
4. Set Up Your Wallet
You have two options: import an existing wallet or create a new one.
Import Existing Wallet
Run the following command:
btcli wallet regen-coldkey --name default --wallet-path ~/.bittensor/wallets/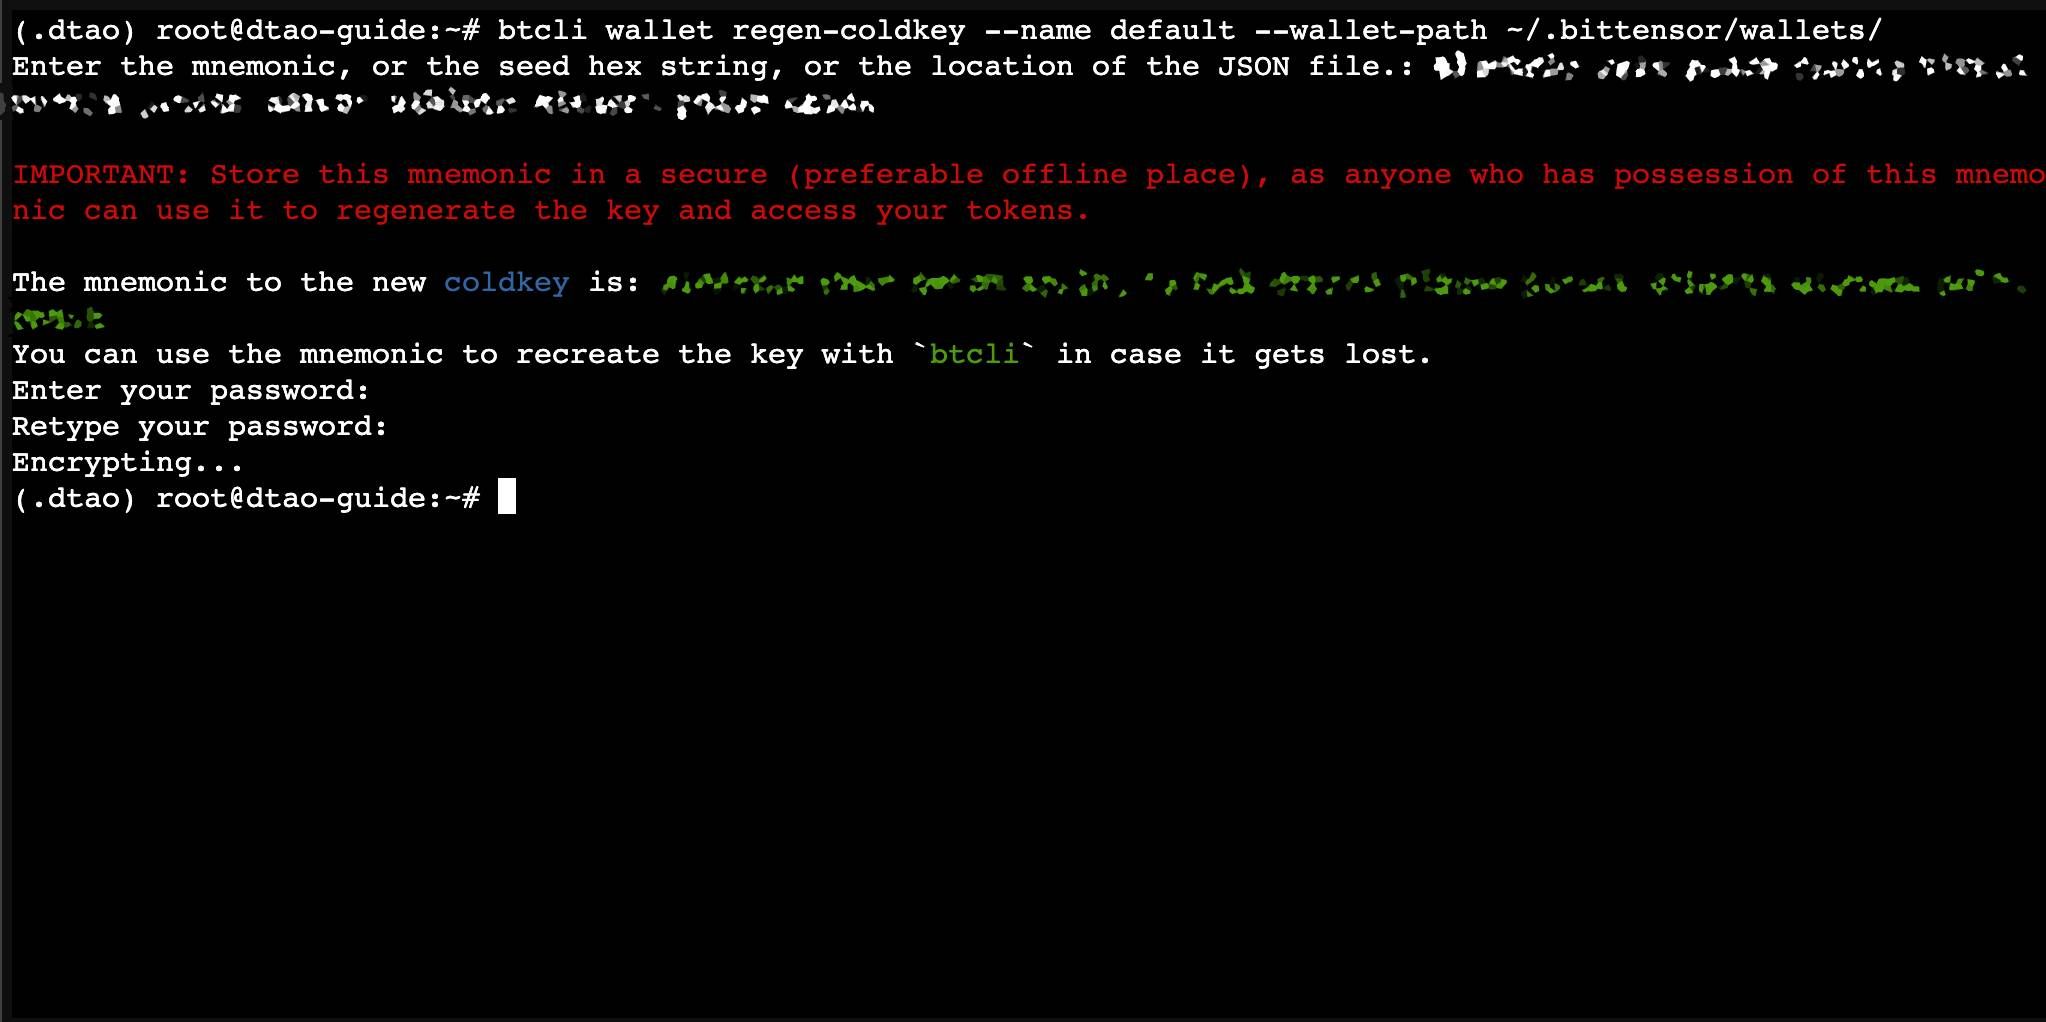
When prompted, enter your seed phrase to recover your wallet. You'll then need to create a new password that will encrypt your wallet locally.
Make sure to store this password in a secure place, as you'll need to enter it for every transaction you make. Keep in mind that this password is specific to your local machine and isn't used anywhere else.
Create New Wallet
Alternatively, create a fresh wallet with a hotkey :
btcli wallet create --name default --hotkey default --n-words 12 --wallet-path ~/.bittensor/wallets/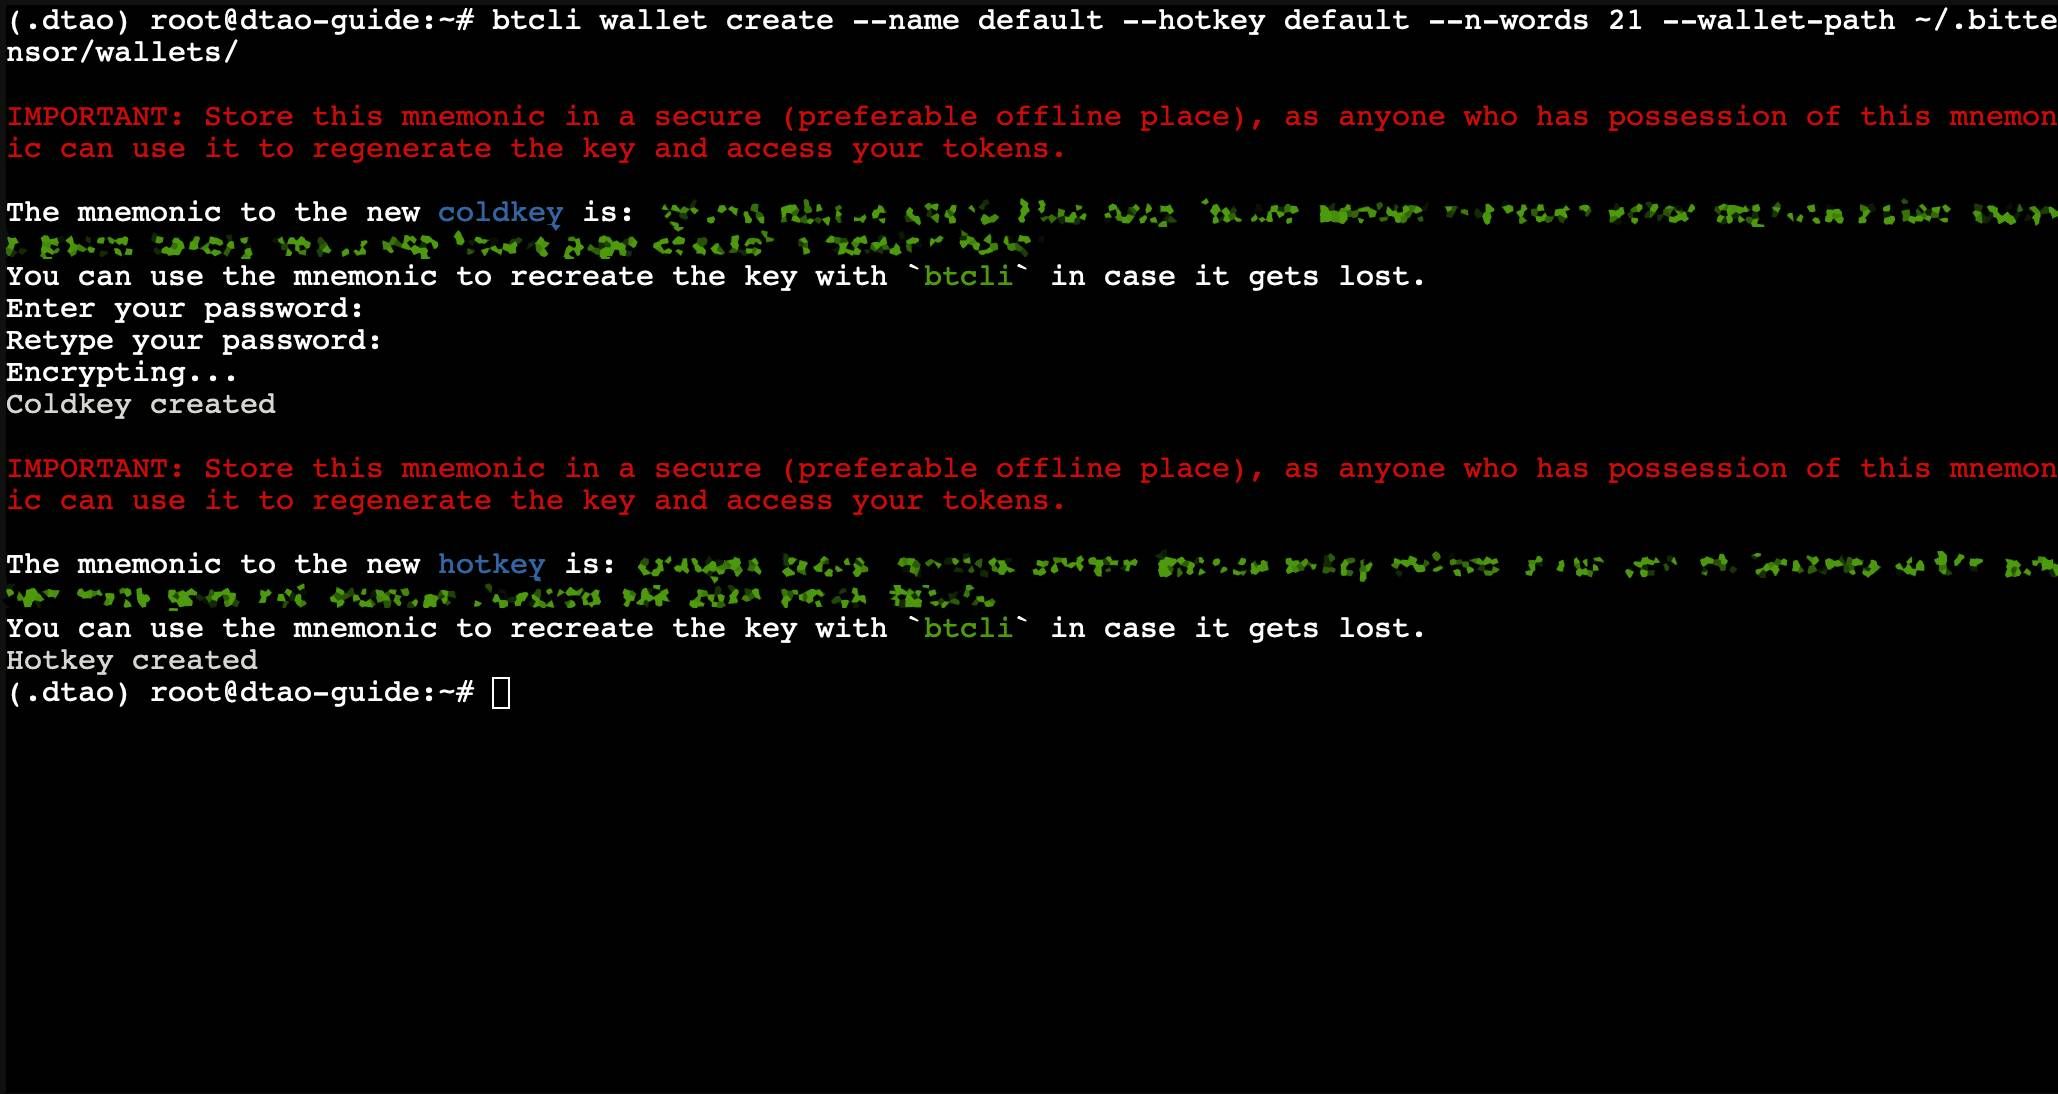
STORE YOUR SEED PHRASES
immediately write down your mnemonic phrase and store it in a secure location. If you lose these 12 words, you will permanently lose access to your wallet and any funds it contains.
5. Request Testnet TAO
To participate in the Dynamic TAO testnet, you'll need testTAO. Follow these steps to request them:
- Join the Bittensor Discord
- Read the FAQ on how to get testTAO
You should reques the testTAO for netuid 0 (root subnet) for simplicity, and for the role enter "Staker/Tester".
To know the ss58-address of your coldkey, which you need to fill in the request form run this command:
btcli wallet listOnce you did it, wait for a moderator to process your request and send the testTAO to your wallet!
6. Participate in Dynamic TAO - Testnet
Now that you have testnet TAO, you can explore and interact with different subnets.
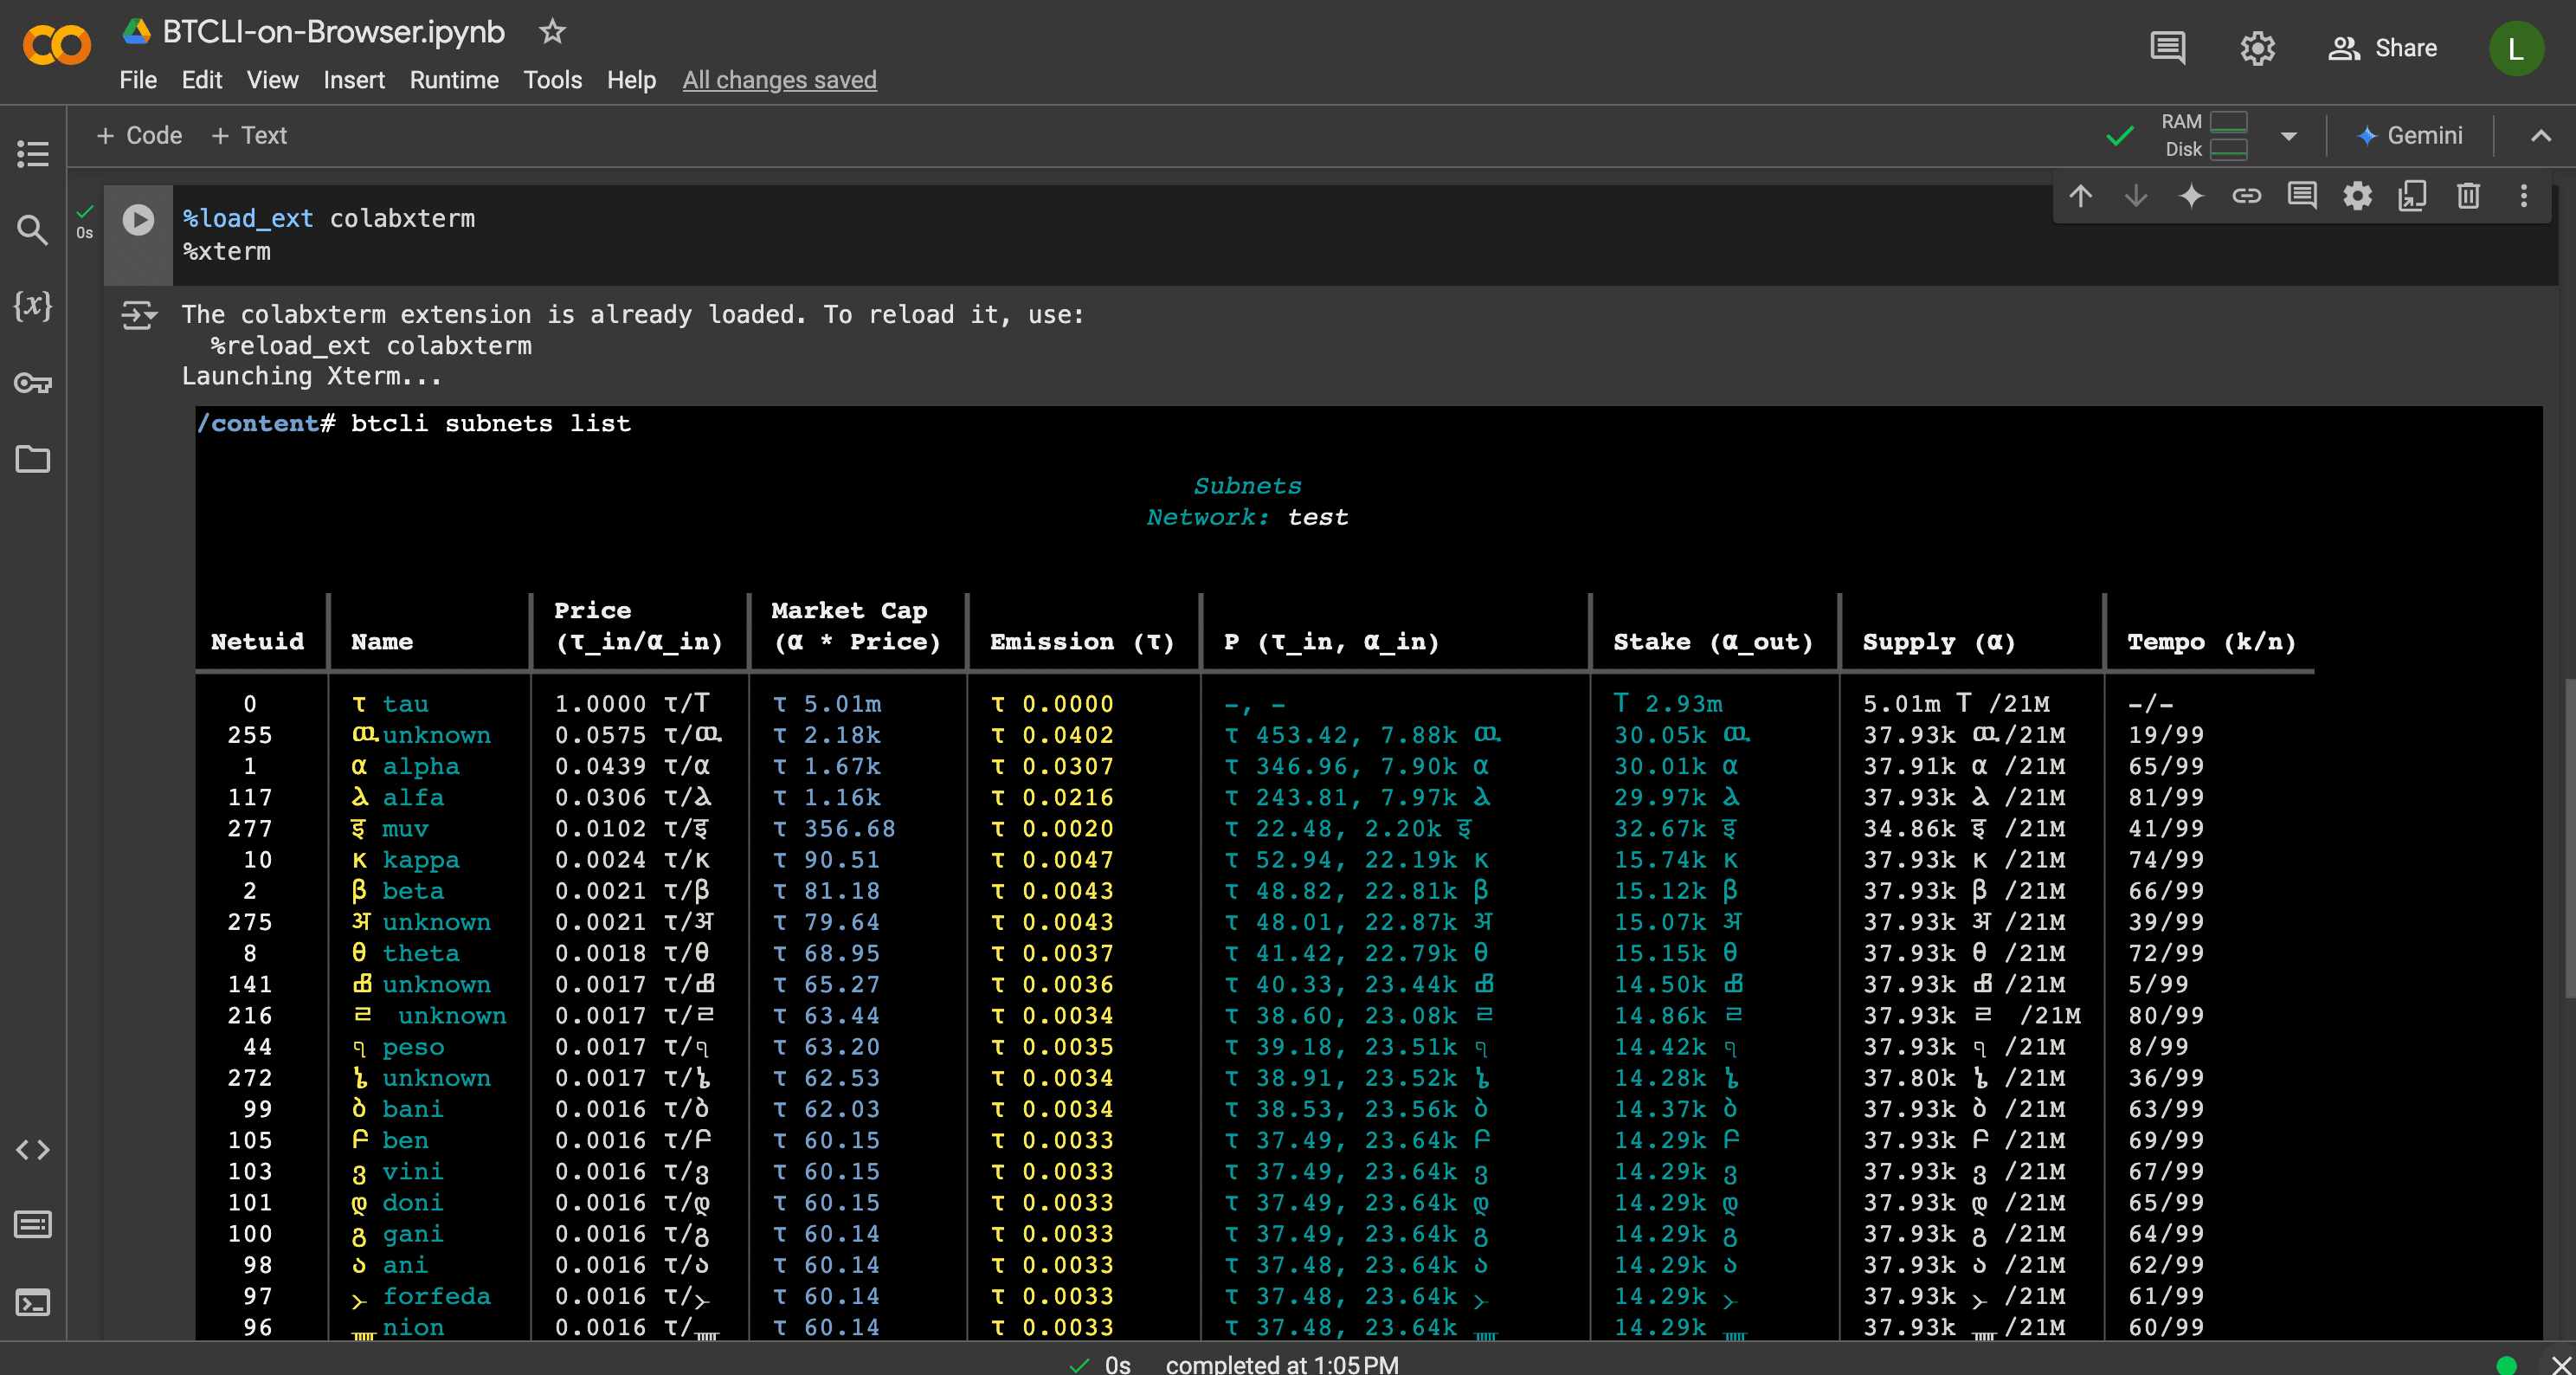
View Available Subnets
btcli subnets list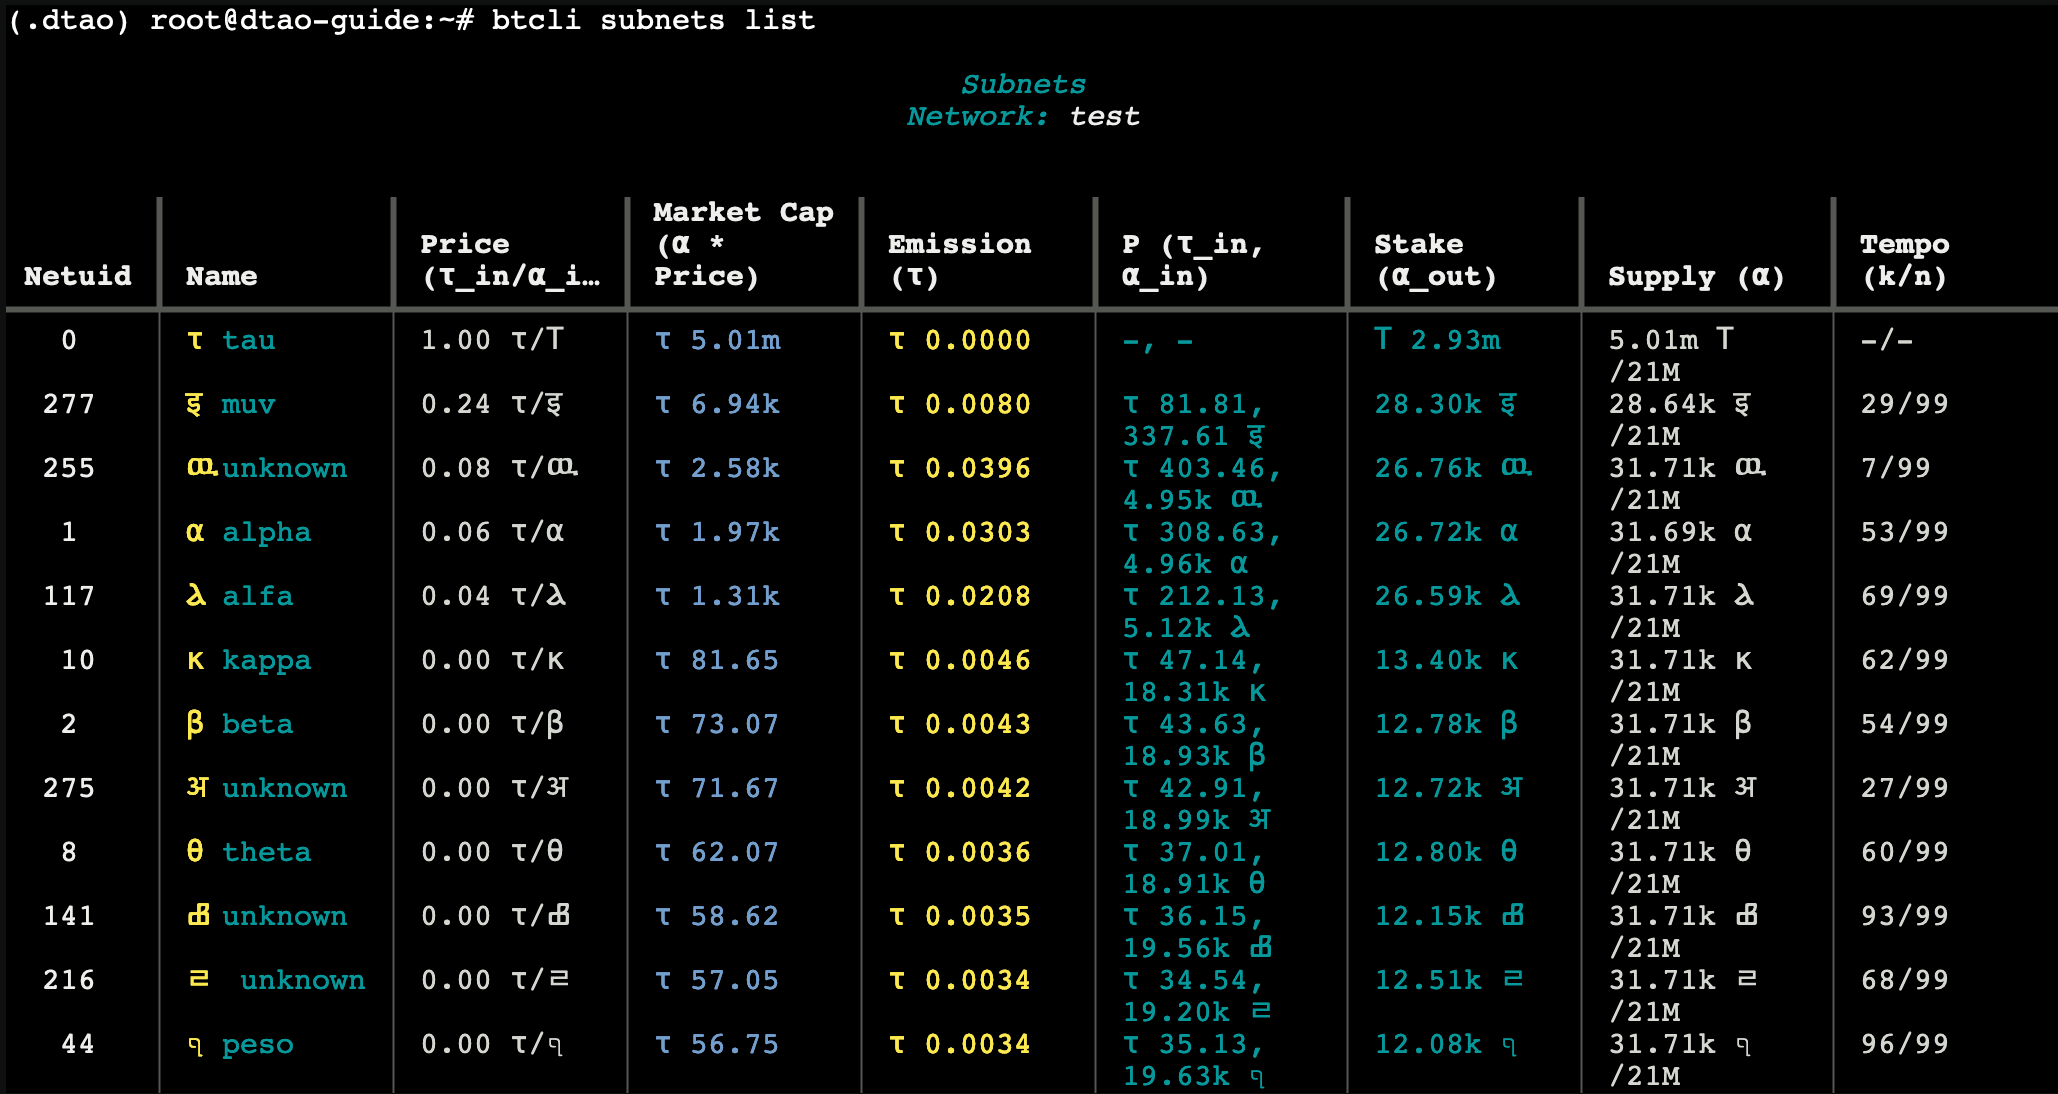
This shows all subnets with their pools, prices, and other details.
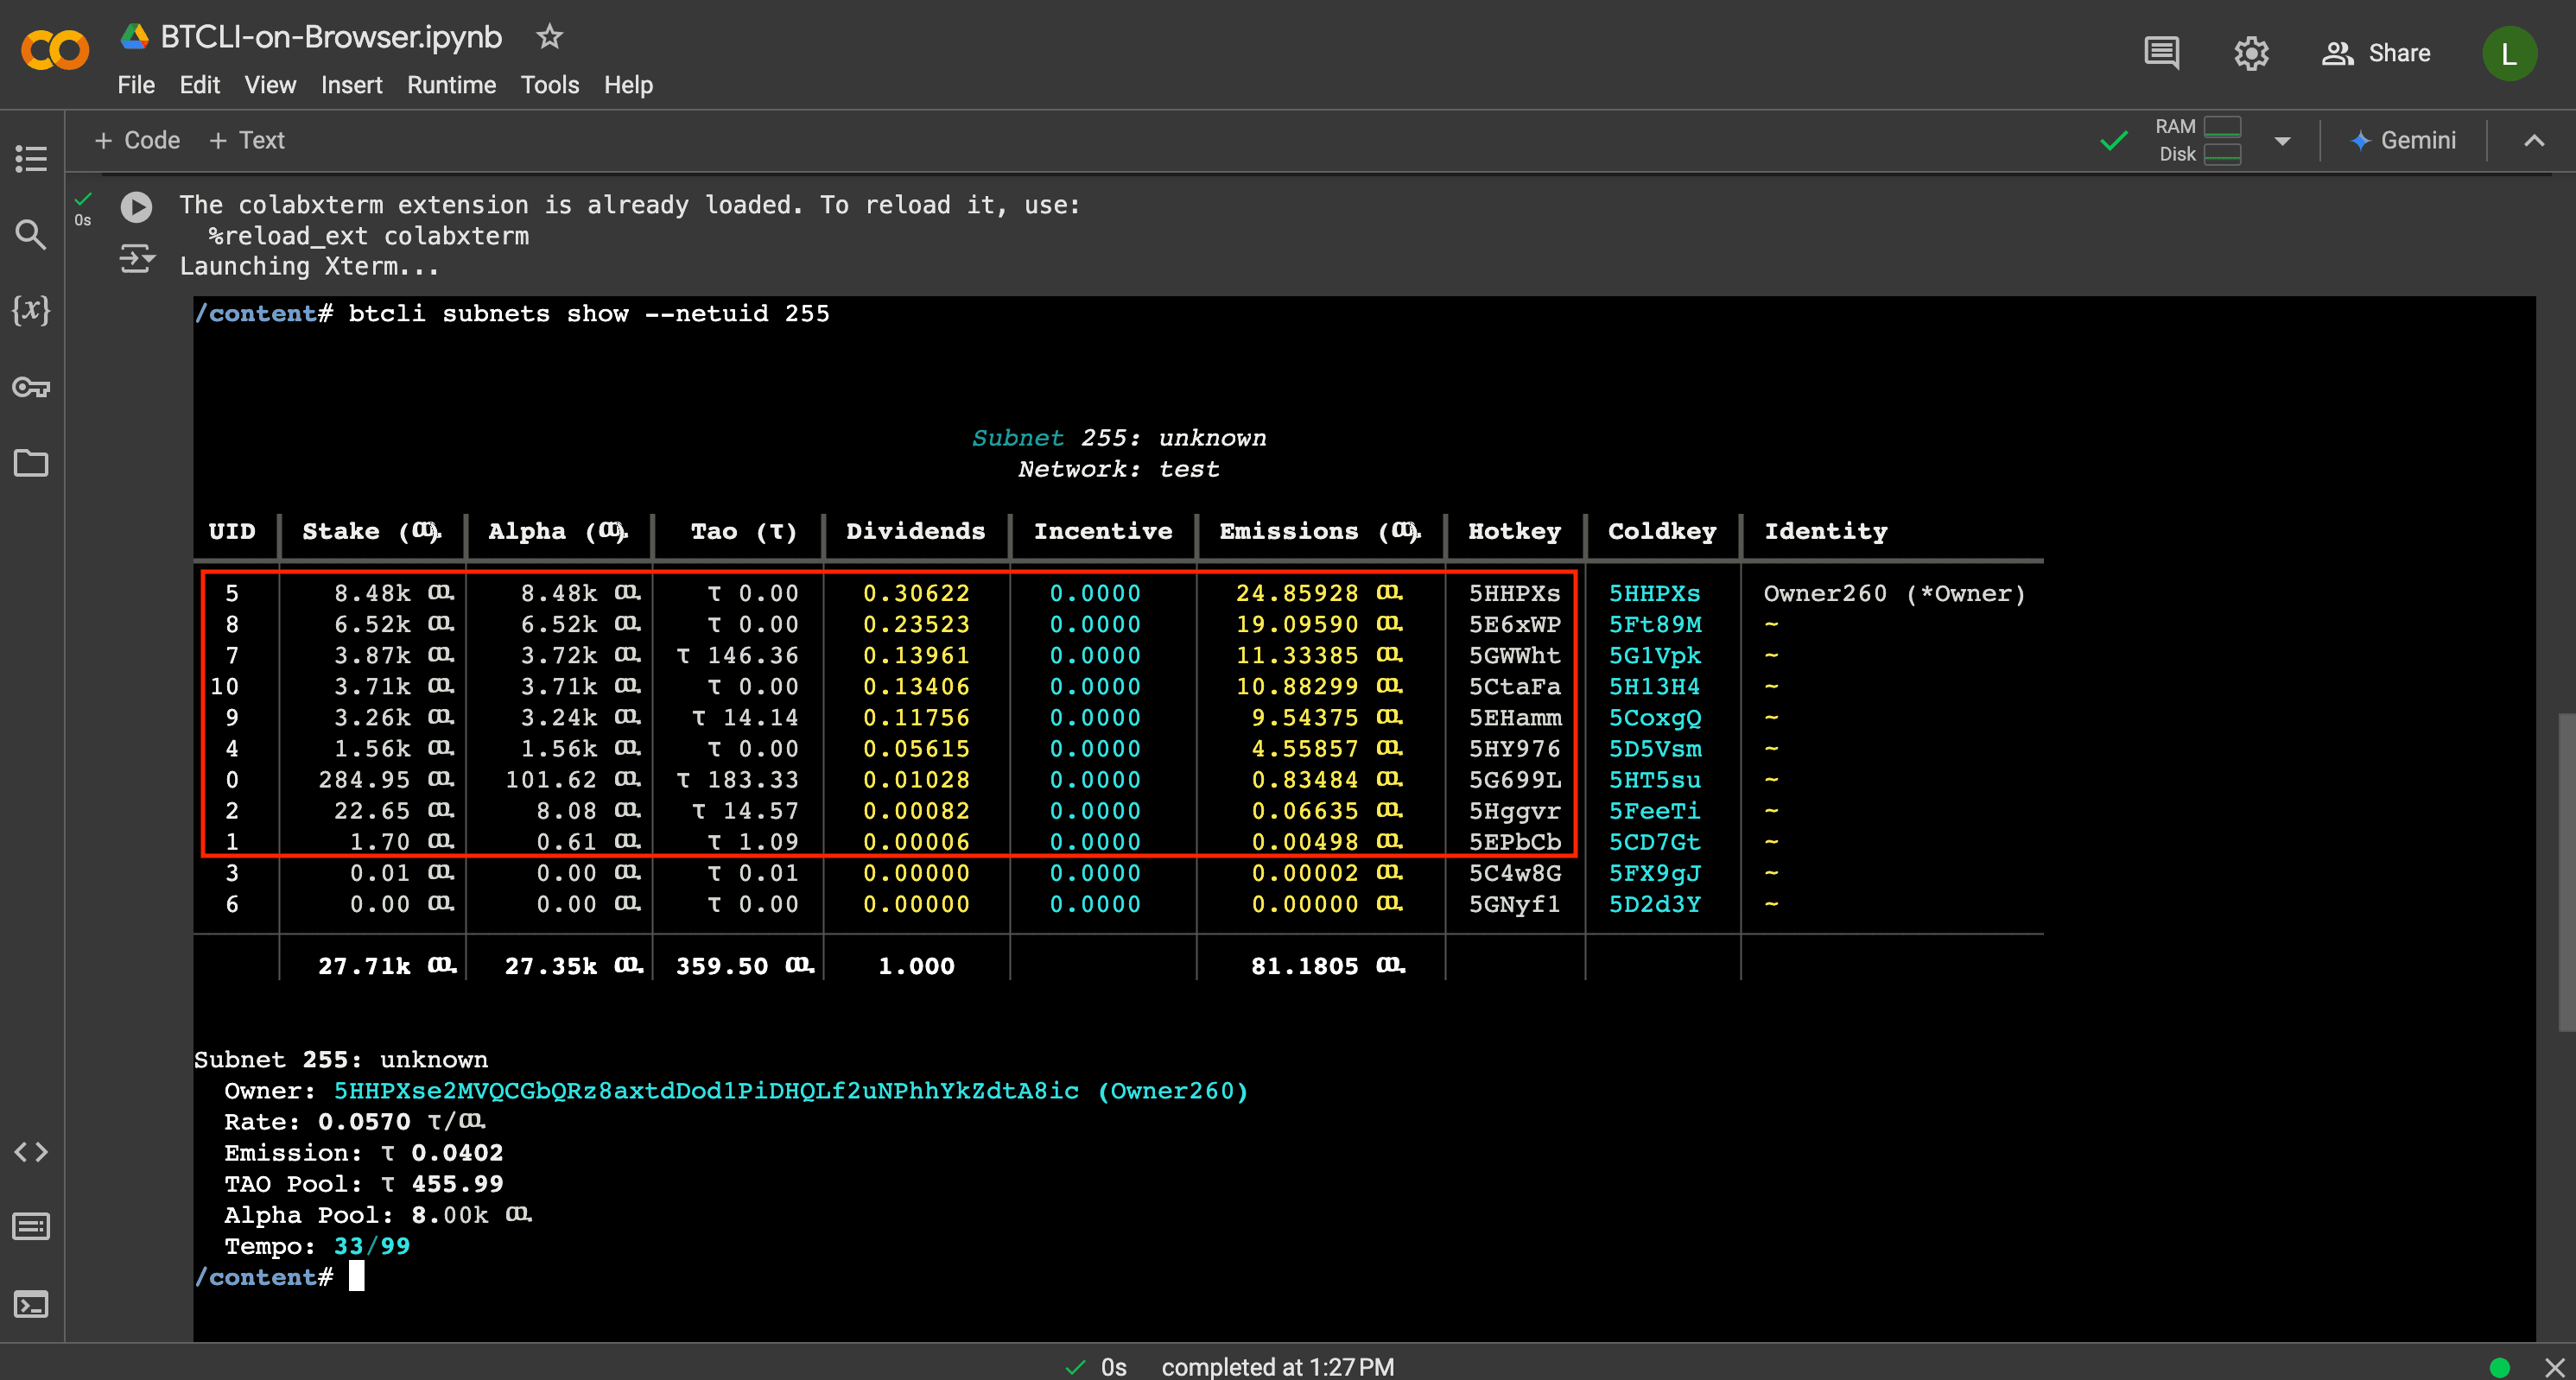
Inspect Specific Subnet
btcli subnet show --netuid X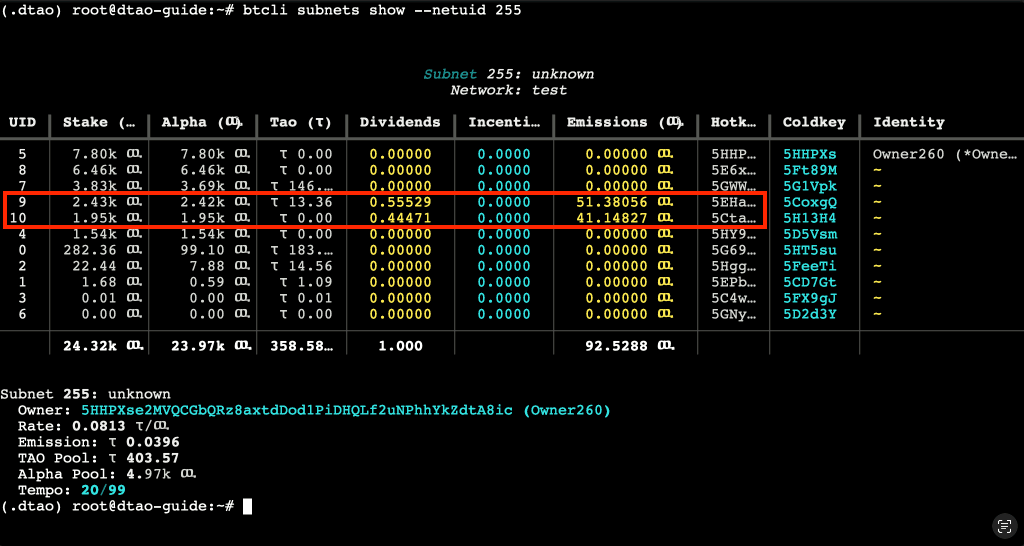
Replace the "X" with the subnet number you want to examine. Then while on the subnet view, you can see all the participants of the subnet. Most important for you will be to find UIDs that are getting dividends (like those marked in the image). These are validators to which you will be able to stake your TAO to.
SHOW MORE INFORMATION
If you want to see more details like the full hotkey addresses etc. then add the "--verbose" flag to the command
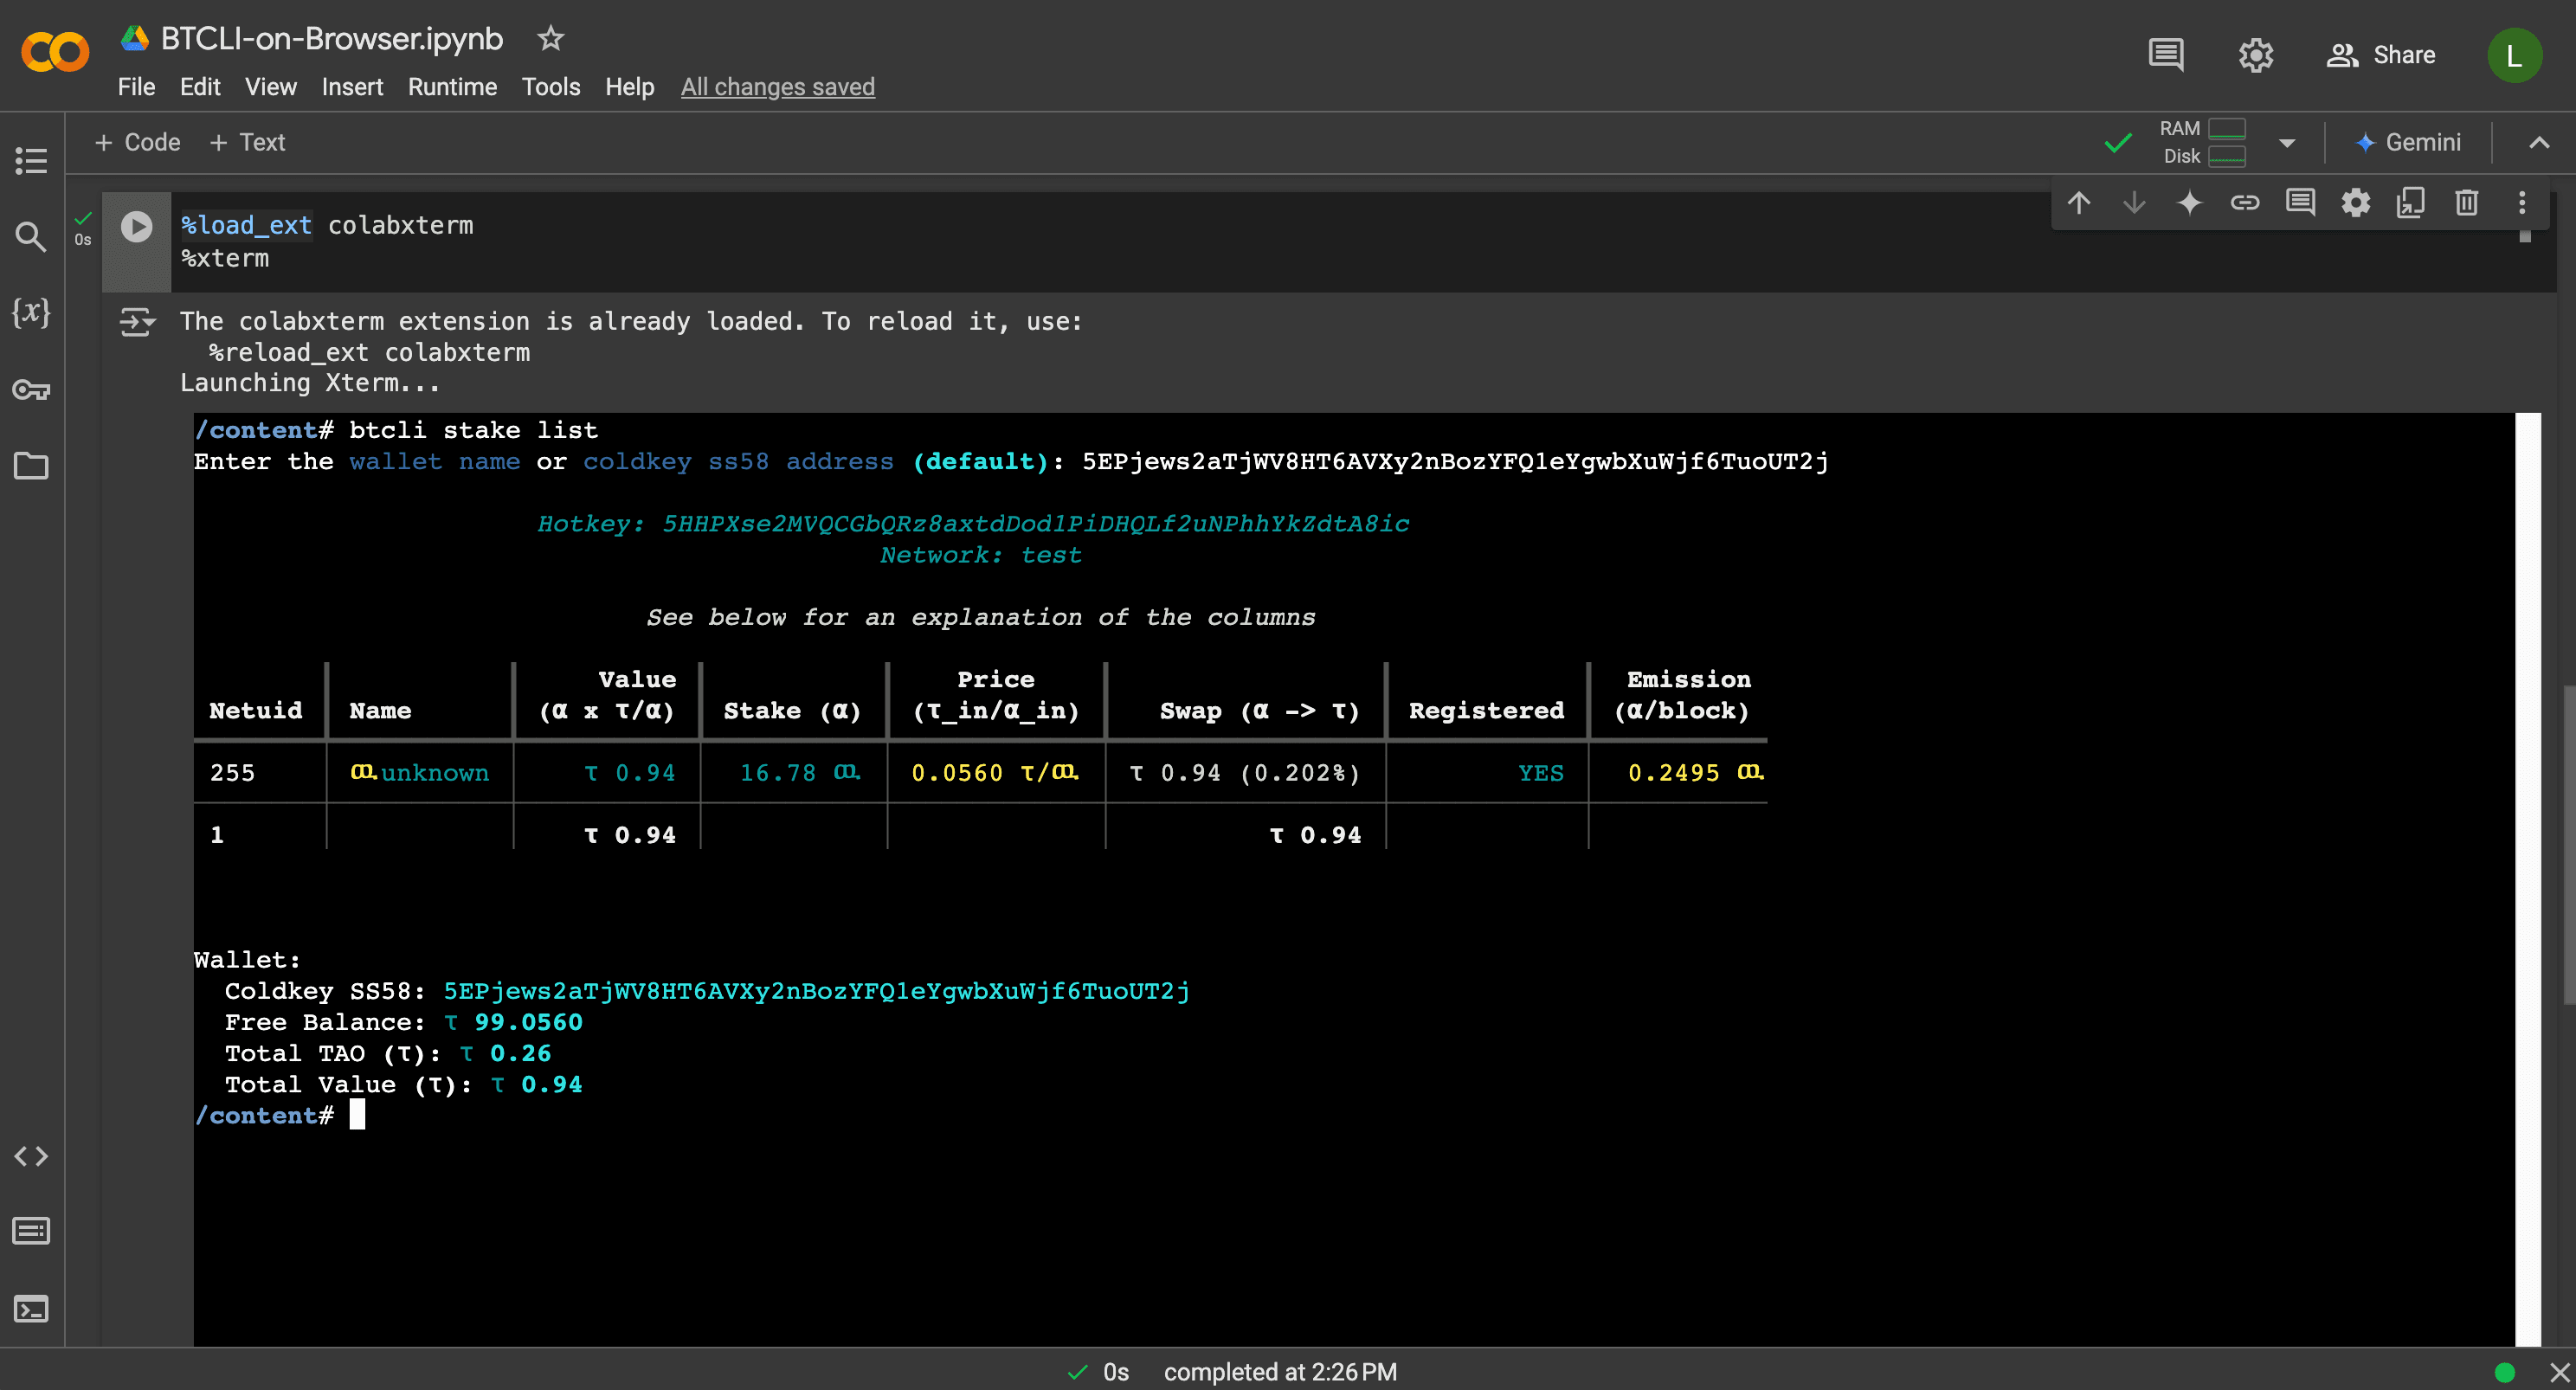
Overview Your Staked TAO
btcli stake listWhen it prompts you for the wallet name or the ss58-address, you can simply type "Enter" if the name of your wallet is "default" as setup in this guide.
Staking Process
- Find a validator receiving dividends (non-zero) in your chosen subnet
- Run the staking command:
btcli stake add --netuid X --name default --amount X- Enter the validator's hotkey when prompted
- Review the transaction details and slippage information
- Enter your wallet password to confirm
ALWAYS ACCOUNT FOR SLIPPAGE
During staking /unstaking operations to subnets (except subnet 0) slippage can occur based on the subnet's pool balance!
To understand how slippage works and calculate the slippage based on a pool's balance, please look at our "Understanding Slippage" section in the subnet pool page, with the included slippage calculator.
Unstaking Process
btcli stake remove --netuid X --name defaultWhen prompted:
- Enter the validator's hotkey
- Choose 'y' to unstake everything or 'n' to unstake a specific amount
- Review the transaction details and slippage information
- Confirm with your wallet password
Congratulations! You are now able to participate in the Dynamic TAO testnet!